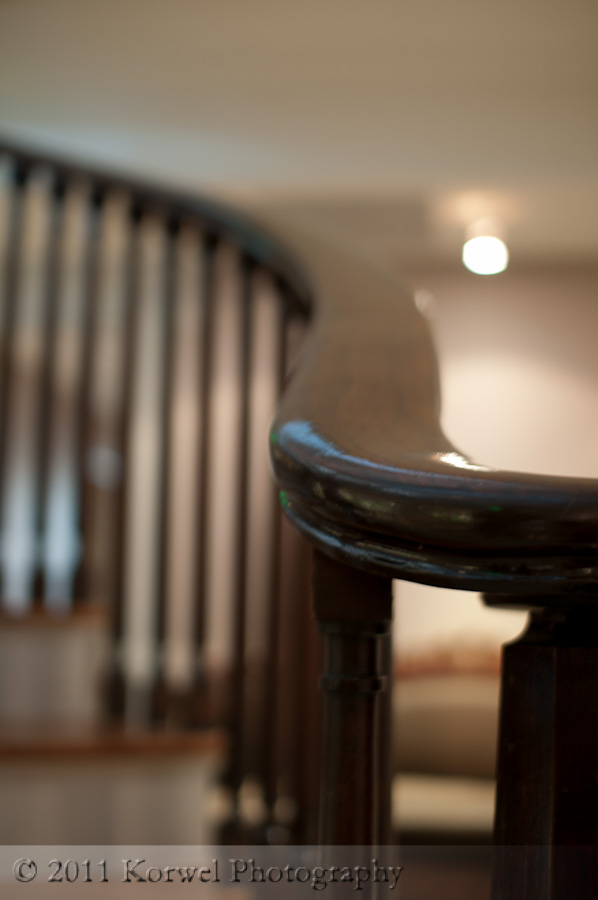
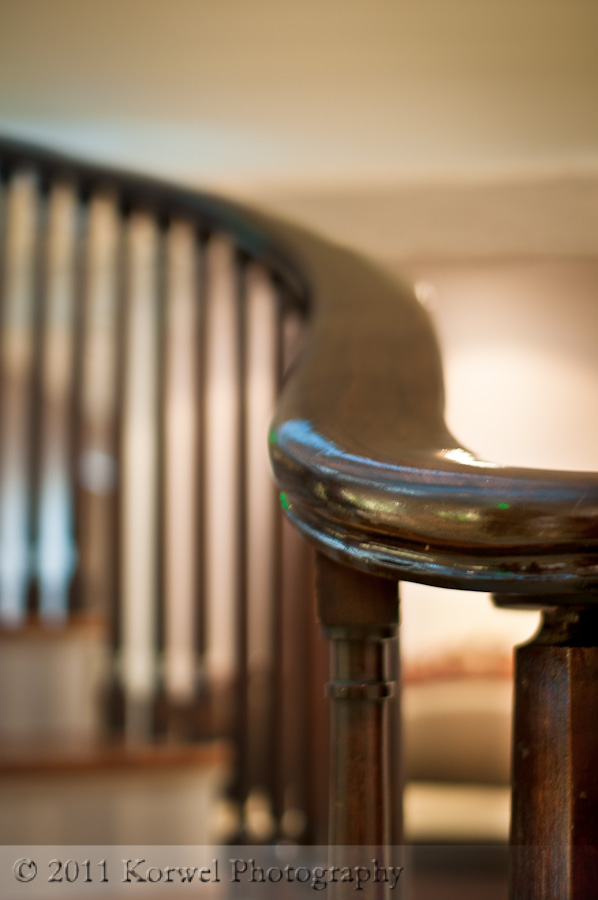
Staircase (Before & After)

I am not sure why this old photo came to my mind today. Maybe I remembered it because I shot it during the Worldwide Photowalk in 2008, and I was just signing up for this year’s event. Or I was thinking about shallow depth of field images and how I like taking them (like the pepper yesterday). Or maybe a combination of both. In any case, when I opened the original in Lightroom I knew right way- this is going to be a post about cloning. The bright spot coming from the light fixture in the right top corner is not adding anything to the image, and creates bright distracting spot.
I don’t know about you, but the cloning is the most difficult task for me to do in Photoshop. There are two reasons for that. First – I do not have any significant amount of patience. The other one is the multitude of tools. I never know where to start. Well, I typically start from the tools which promise to get the job done for me. So Content Aware goes first. If after three tries that doesn’t give promising results, I move on to Patch tool. The last resort is Clone tool itself. I am sure it partially comes from the fact that I still cannot master the different setting on those tools, so their default behavior is hit-and-miss.
In the case of this image, the Content Aware did a decent job right away. The only problem it created was the fact I had to do it on original layer. I duplicated the layer afterwards, to make tweaking of subsequent changes easier to undo (remember that History is good only 20 last steps. When cloning, 20 strokes is hardly anything). So I cloned out the rough edges the Content Aware Fill created and even out the ceiling colors where the lamp was.
Afterwards, I took the image back to Lightroom to finish it of. I added some Clarity and Vibrance. I lightened the front part of the stair rail, and darkened the rest of it. I added a vignette to darken everything else and put focus on the rail. I sharpened both front of the rail itself, and overall the image.
There two lessons from this image. For cloning, to use more then one tool to achieve the optimum results of masking the corrections. And to look carefully at the image after you are done with global adjustments- if you see too bright spots where you don’t want to draw attention, and too dark spots where you do want to draw attention, use the Local adjustment to even them out with the rest of the image. This is the one lesson I learned from Michel Fry’s e-book on image post processing (“Light and Land. Landscapes in the Digital Darkroom” available from Craft&Vision) which made the biggest difference for my photography.
